To add a new Block, click the Add… button at the bottom left edge of the Block Table pane.
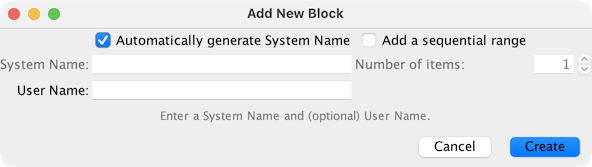
In the pane that opens, enter a valid System Name for the Block and if desired enter a User Name. Blocks are "internal" objects with a system name prefix of IB. While the user name is optional, if the block is going to be used as a block for Layout Editor track, it must have a user name. User names are also required if "Automatically generate System Name" is enabled. Both names must be unique within the Block table. See the "Names" Help page for more information.
Click [Create] to complete this step. Click [Cancel] to close the pane (don't worry, already created items will stay).
Complete the definition of the new Block by closing the Add New Block pane and clicking
the Edit button at the right of the newly created Block entry in the
Block Table.
Fill out all fields as described on the Block Attributes Help
page.
It is also possible to create a number of Blocks in one go.
Where supported, the "Add a sequential range" check box will be enabled.
Checking the "Add a sequential range" box will enable the "Number of items" field. Set the
number of Blocks that you wish to add. Clicking [Create] will create a number of sequentially
numbered Blocks.
If a User Name has been entered, a number will be added to the end of that name (starting by
#2) to keep each Block User Name unique.
To add the details of a new Block, close the Add Block pane by clicking Cancel or the Close/X button and click Edit to the right of the new entry in the Block Table.
See Names under General Help for more information on JMRI object naming.
Back to the Block Table help page.