
The Single Step Upgrade is designed to upgrade JMRI running 3.x or 4.x using Java 1.8 to the current 5.x version of JMRI using Java 21.
The goal is a clean user data configuration using the existing data. The process eliminates old intermediate data created by some of the JMRI upgrades.
A basic feature of JMRI is that the OS file system is usually invisible to the user. The various tools know where the data is and how to manage the data. This process requires a basic understanding of the OS file manager including renaming directories and copying files.
Since the existing preferences will be replaced by default values, screenshots of important preferences should be captured. The main ones are the Connections, Defaults and Start Up actions. Depending the installed JMRI version, a CMRI connection might contain the node definitions.
The JMRI file locations are listed at Help ⇒ File Locations. A screenshot is recommended for reference.
The JMRI user data is stored at the Settings Location. With PanelPro and DecoderPro stopped, use the file manager to append the current date to the settings location, such as JMRI_260815. The default settings locations are:
If custom items, such as icons or scripts, have been added to the JMRI Install Location, they need to be copied to a safe location.
Java version 1.8 or earlier must be removed.
For Windows and Linux look at the uninstall instructions at https://www.jmri.org/java/.
For Macs, use the instructions at https://www.java.com/en/download/help/mac_uninstall_java.html.
Install Java 21 using the instructions at https://www.jmri.org/java/.
Download and install a recent version of JMRI.
To simplify the copy actions, use PanelPro for the first run. This will create the My JMRI Railroad profile. Use the simulation option when defining the layout connection.
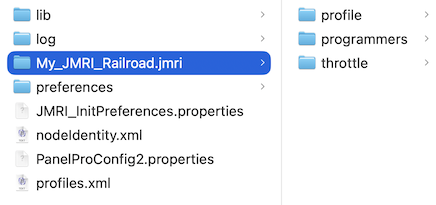
If the layout uses multiple profiles or custom profile names, use Preferences ⇒ Config Profiles to create additional profiles.
Use Help ⇒ File Locations to get a screenshot of the new File Locations.
When moving the data from the renamed Settings Location, use the OS file manager Copy process, not the Move process. This insures that the orignal data in the JMRI_<date> directory is not affected.
The following details apply to typical JMRI features.
The roster directory and its contents are copied to the new User Files Location.
After starting DecoderPro or PanelPro, create the roster.xml index file.
The main file is the layout data configuration xml file, aka panel file. The file is copied to the new User Files Location.
Custom icons should be in the old User Files Location resources directory. If so, copy the resources directory and its contents to the new User Files Location.
If they were in the old install location, create a resources directory in the new User Files Location and copy them there. When the layout data xml file is loaded, an error dialog is displayed. The dialog has an option of changing the file path for custom icons. If the relative path to the custom icon is the same, this can done by replacing program: with preference:.
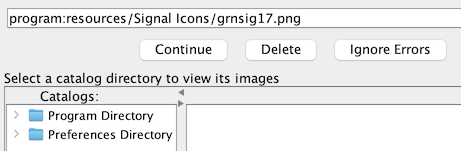
When the path has been fixed, click on Continue. After the loading process is done, use File ⇒ Store ALL table content and panels… to retain the changes. Using a new file name is recommended.
Copy custom Jython scripts. If they were in the old Install Location, copy them to the new User Files Location. It is likely the scripts will have errors. Use the JMRI System Console, Help ⇒ System Console, to watch for script errors.
The operations directory and its contents are copied to the new User Files Location.
The dispatcheroptions.xml file and the dispatcher directory and its contents are copied to the new User Files Location.
As of JMRI 4.4, the CMRI node definitions are contained in the profile/profile.xml file located at the old Profile Location. Prior to JMRI 3.8, they were in the PanelProConfig2.xml file in the old Settings Location. Between JMRI 3.8 and JMRI 4.4, they were in the ProfileConfig.xml file in the old User Files Location.
The CMRI configuration data is added to the CMRI connection definition.
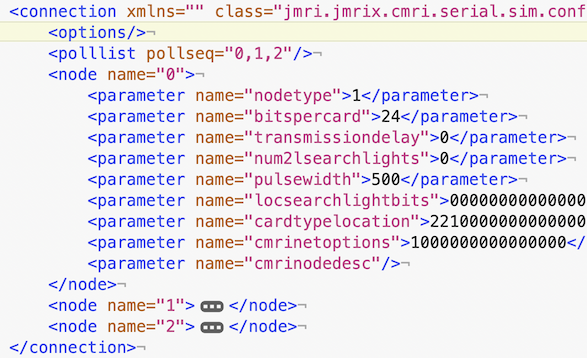
With careful editing it should be possible to copy the old CMRI located between the two connection lines to the new profile.xml. The unknown factor is whether the data format has changed. The image shows the current data format.