
The Speed Profiling tool is designed to create a profile of a loco at various speed steps to help with the automatic running of a loco within JMRI using either DispatcherPro or Warrants. The primary goal is getting a loco to stop, or change speed (Ramping) within a specific distance using known Throttle settings.
The tool is accessed through PanelPro's Roster ⇒ Speed Profiling menu item or DecoderPro's Actions ⇒ Speed Profiling menu item.
It works on the principle of timing a loco over a known distance at a given speed step, in both the forward and reverse directions. It requires three sensors which monitor the occupancy around three contiguous sections of track. Ideally the middle section of track that the timed runs are performed over should be straight, and a minimum of 1 meter long; the longer the length the better the result. For this profiling to work correctly, acceleration/deceleration should be disabled in the loco decoder.
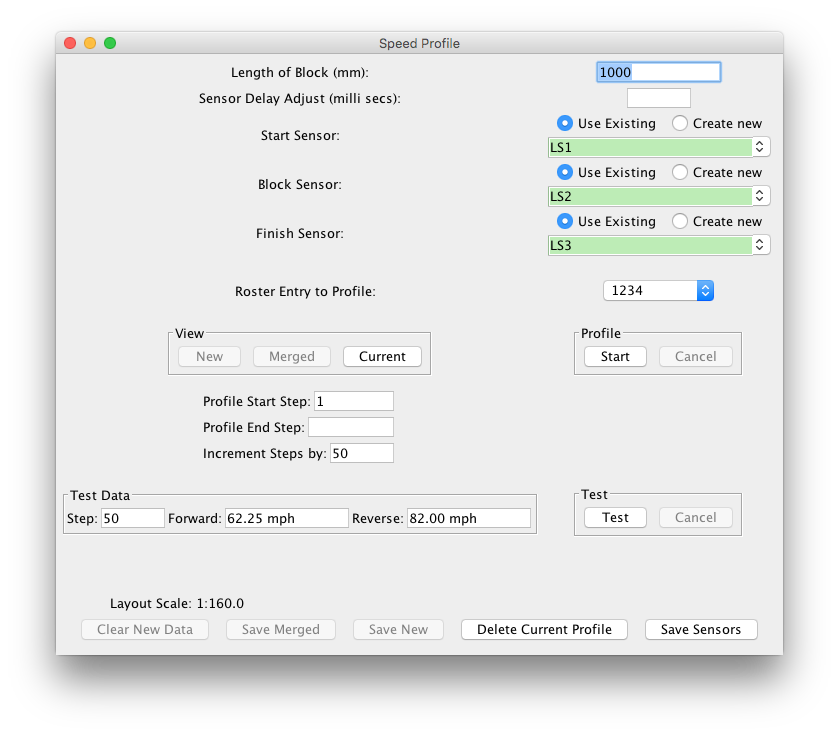
To profile the loco, fill the above details into the pane, place the loco in the starting section facing forwards towards (but not on) the track Block that the timed run will be taken over, then press Start.
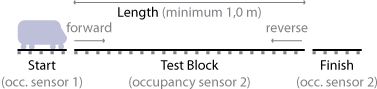
What happens is that the tool will set the loco off running in the forward direction at the Profile Start Step. When it activates the timed section sensor it starts a timer. Once the finish section sensor is activated the timer is stopped, and the speed is calculated in Millimeters per Second. This is then recorded in the New profile table. The tool will then ensure that the loco is clear of the timed section sensor, then repeat the procedure again but in the reverse direction. Once the loco is back at the initial start section, the whole procedure is repeated again for the next speed step, this occurs until the Profile End Step has been completed.
Profiles can be made with fewer speed steps by choosing the steps to start and end on, and how many steps to increment/decrement to the next sampling step. When a starting step is larger than 4 be sure to place the loco in a position that will allow it to achieve full speed before reaching the block sensor.
The first four buttons at the bottom are used to manage the speed profile within a roster entry.
While the profiling process is running, a series of messages is displayed in the lower left portion of the window. This is the initial message while waiting for the middle sensor to become active.
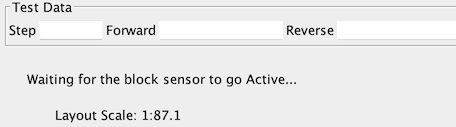
Once the middle sensor becomes active, the message changes to show the current step and direction: Profiling Step (Forward) 1 of 121.
When the destination sensor becomes active, the timing is done, but loco has to clear the middle section before it can be stopped: Waiting for Loco to clear Block Sensor....
Having completed the profiling, it is possible to test a Profile. Place the loco in the starting Block again, facing forward toward the timed Block, ideally some distance away from it. Enter a starting speed number in the Test Data - Step box, then press Test.
What will occur is that the tool will set the loco running at the given speed step over the Test Block, stop and reverse at the same Step. Measured speed will be reported in the Forward and Reverse boxes.
Results will vary especially at the higher speed steps, where you will more likely experience an over run.
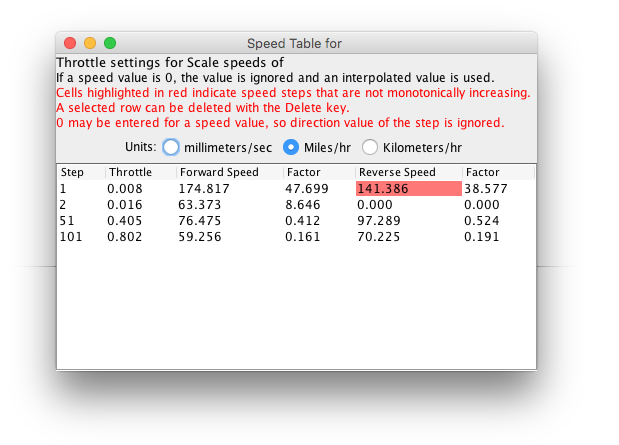
Click one of the buttons in the View area to open a table showing the profile values for either the New Profiling results, Current stored in the Roster or a combination of both. Cells in the table contain the speeds attained by the loco for each throttle step in both directions.
The default speeds are in millimeters per second as measured layout track speed. These values can be converted to scale speeds by selecting either of the "Miles/hr" or "Kilometers/hr" (per Hour) radio buttons over the table.
The Factor column is the ratio of track speed (mm/sec) to throttle setting (from 0.0 to 1.0).
In the example (using simulated timings) cells with unexpected (non-incrementing) values are marked in red. Such cells are editable to correct the value or the whole row for that step can be deleted. Normally the red instruction will not display.
The default Units selection is set using Preferences ⇒ Warrants.

This setting is also used by the Test results. If Miles/hr or Kilometers/hr are selected the layout scale also needs to be selected in Warrants preferences.